08 August 2014

sewing endeavors


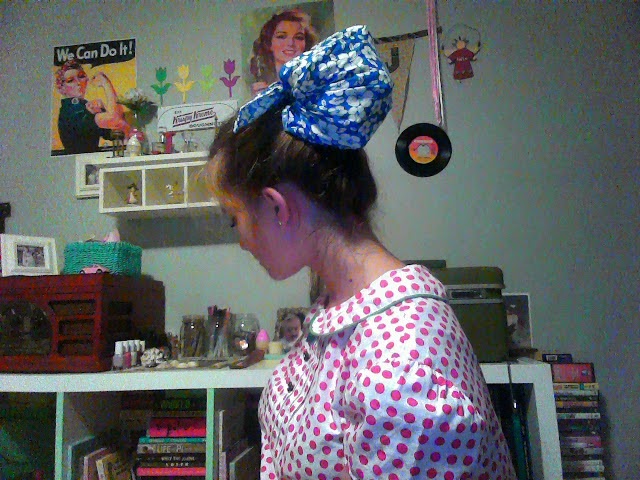
I've had a sewing machine almost my whole life, but I've never done much with it other than little pillows and repairing things. but this weekend, I made my first skirt, and it went so well that I made another. the one I'm wearing in the picture is actually the second one I made, but I have yet to find a shirt that works with the first. (the other one is knee length and yellow with little ruby slippers all over it)
the fabric was just a couple dollars per yard at walmart, and I still have basically enough to make a second skirt with both fabrics. I just did simple gathered skirts and threw on a waistband, zipper, and button. It took all of 3 hours to finish both. hopefully I'll get back to the store soon so I can get more fabric and start a collection of these.
oh also, if you're wondering why my hair looks so short, it's because it is. it was getting too long to curl, so I got it cut to just above my shoulders. I'm still trying to figure out how to curl it without looking so shirley temple-y. (suggestions are appreciated) :)

with love,
Julia

p.s. last night I went to see the arctic monkeys at staples center in LA and it was amazing
p.p.s. I'm leaving in like an hour for NorCal to go to the ranch and to a ZZ Top concert, so I won't be posting until after the 18th or so.

31 July 2014

pinup prom

hi! I meant to post this almost a week ago, but the wifi was out at my house all weekend and then I got caught up with great weather and going to the beach. oops.
anyway, as anyone who follows pinupgirlclothing on instagram already knows, last friday they had a prom to celebrate the anniversary of their store in burbank. everyone had gorgeous dresses and immaculate hair and it was all really cute and colorful. across the street was a cute little candy shop with all sorts of glass bottled sodas and penny candy and tin signs and stuff.
if you're ever in LA/Burbank area, you should definitely check out the boutique. it's just like the website but in real life and even more pink. :)

with love,
Julia

p.s. happy birthday harry potter

22 July 2014

where I've been


hello! I haven't been posting for the last week or so because I was in a tiny town in Nor Cal called Nicasio. my family has had land there for over 100 years and we go up there two or three times a year. we have cows and chickens and a vineyard and stuff, and our property is right next to Skywalker Ranch- George Lucas's property (!!!). my great grandparents were married in the one church in town, and my great great (great?) uncle or grandpa won the town's only hotel in a game of poker and lost it in the same way.
anyway, there's all sorts of cute towns nearby, and San Francisco is just 40 minutes away. one day we went into Point Reyes Station and looked in all the little thrift shops and stuff. my sister and I packed a picnic and hiked halfway up the hill to our vineyard and it was all beautiful.
my aunt (who lives in a darling yellow house on the property) runs an antique shop in what once was the town's butcher shop. she always has great little animal figurines and antique kitchen things and old pictures. on our last night, she pulled out a photo album with great pictures in the 50s and 60s of my grandpa (her brother) and her europe trips and my dad & his cousins as children. here are some pictures of my father in his prime- in a new, somewhat racist-looking slicker on christmas, and with my grandfather, sporting some saddle shoes to match mine. I think he's in kindergarten in both of these.
we drove home along the coast as much as possible, which was absolutely gorgeous. there's always dozens of strawberry stands and cute towns and stuff. we stopped to peek in at the Madonna Inn, which is fabulous and pink and somewhere north of Pismo Beach. this is the dining room- I just about died when I walked in.
anyway, that's where I've been. I'll be back to my regular schedule soon enough. I bought some really cute fabric for really cheap at walmart, and I'm going to be making some skirts soon. if anyone has any tips/patterns/ideas/warnings, drop me a comment, I'd love to hear from someone with a little more knowledge on the matter. :)

with love,
Julia

09 July 2014

simple 50s ponytail tutorial


 I've been meaning to post this tutorial for waaayyy too long, but every time I had a chance to, I'd be too lazy. The pictures are pretty bad quality because I had to use my webcam, but finally, here is my tutorial for how I wear my hair almost every day. My hair's starting to get too long for curling, but I can still manage this 'do without it looking too sloppy. I actually got the idea of just curling a ponytail from 13 Going on 30, one of my favorite movies. I couldn't find a screenshot of the right scene, but when Jenna is getting ready for a big party, there's a split second glimpse at her hair in a ponytail with curlers. She wears her hair completely different (much more early 2000s rather than mid century) than your hair will end up from this tutorial, but it's all the same general idea.
What you need:
(pretty self explanatory)

  • foam rollers
  • hairspray (I use Aussie, which is great for getting hair to stay all day without crunchy curls)
  • spray bottle of water
  • bobby pins
  • bandanna/scarf
Curl a section for your mini victory roll
you can skip this step if you have bangs or don't want it or want to do another style in the front, but this is just how I do it. My "bangs" are ridiculously grown out, but this little roll still works really well. roll this part UP, not down like the other curls will be.
Make a high ponytail
do I even need to explain this step?
Begin curling the ponytail
this part is very easy, but a little hard to explain. unlike most curl sets, you won't be making sections, or even curling all of your hair- it's very random and can use anywhere from 15-40 rollers.
basically, just take little pieces each time and roll. nothing has to be exact, but if it feels like you're putting too much hair on one roller, just use a smaller section of hair.
spray each piece-to-be-curled lightly with water and hairspray.
***roll every curl DOWN- this should be the opposite of doing something like victory rolls. when you finish each roller, the hair coming from your head should be at the TOP of the roller.
Continue like this with the rest of the ponytail
when you're done, you should have a sort of ball of curlers sticking off the back of your head.
tip: try to roll each roller as close to your ponytail holder as possible. remember, all of this hair is coming from one place and there is limited space to curl everything perfectly, but make tight curls and tuck each roller under the ones above it. I'm not sure if that made any sense, but hopefully you'll understand when you start curling. you can always leave a comment if you have any questions.
Curl your baby hairs (optional)
skip this step if you don't care, but I always like to curl the little baby hairs that grow by my forehead and at the nape of my neck.
Hairspray and cover with a scarf
spray everything and tie up in a scarf as you would normally do around your head. it doesn't have to be perfect, it's just to protect your curls while you sleep. (by the way- if you normally sleep on your back, that probably won't be happening with this tumor-looking thing hanging off your head. try sleeping on your side.)
In the morning, undo the baby hairs first
it helps to spray a little hairspray all over all the rollers, same way you did before covering with a scarf.
Make a little victory roll
skip this if you have real bangs or didn't curl this part. roll it up (neatly) as you would with any other sort of victory roll or pin curl. generously hairspray.
Undo the rest of the rollers (obviously)
start from the bottom and work your way up, so the first curls you put in will be the last to come out. you should end up with a result somewhat like the bottom two pictures. this isn't one of the best sets I've ever done, but you get the idea.
Brush out the top inch and hairspray
only brush the very very top. this step is just so that the top few curls don't stick up at the top.
hairspray once now and let it sit a minute or so. repeat and repeat again. sometimes I apply hairspray as many as 5 times before going out, just to make sure my curls stay for as long as possible. tilt your head to each side and spray the underside too.
Personalize it
I usually just add a ribbon, but you could also tie a bandanna around your head or clip in some flowers or pretty much do anything you want.
Finished product:
everyone's hair is different, so yours might be much more or much less curly than mine, but hopefully it all worked out and you ended up with something you're happy with. I like this style because it can be very casual and simple but still looks polished enough for nicer events. it's not as detailed and big as a lot of hairstyles on the rockabilly scene, but I think it's a pretty good modern representation of mid-century hair.

some ponytail inspiration

with love,
Julia

p.s. ignore the messy wall behind me- I'm in the middle of redecorating :)

01 July 2014

DIY 4th of July Banner

I usually have paper flowers along this blank spot of wall, but given the upcoming holiday this week, I thought I'd make a festive little banner to fill the space.
What you need:

  • red, white, and blue construction paper
  • tape
  • scissors
  • pencil (not pictured)
  • ruler
  • fishing line (or other thin string)


Cut your first triangle
This will be a model for the rest, so be sure its exactly the size you want it to be. Make them as big or as small as you want, but make sure they're not too wide/long/short/thin.

Cut some more triangles
Line up that first triangle on your next paper, trace, and cut out. I used 9, but you can make as many or as few as you need.

Line up your triangles and cut a piece of string
make sure every triangle has the side with pencil marks facing UP. leave an inch or two of extra string on each side. line it up just above your row of triangles and tape down the ends so it'll stay put.

Slide the triangles up & tape
this step is really simple but I'm not sure how to word it super well. slide your whole row of triangles up so that they are under the string (pencil marked side up still). make sure it's all even and in the order you want and have less than 1/8 of an inch of paper above the string. tape each triangle to the string. remember, it's the back, so it doesn't have to be pretty.


Hang it up
hang it from the ceiling, a shelf, bedposts, or just tape it straight to the wall like I did. tape the ends to your wall/surface the same way you did on your table/workspace.

Fix any crooked triangles
any corners that are sticking up/out are easily remedied with a loop of tape.
 
& voila!

happy 4th of july (a little early)!

with love,
Julia